
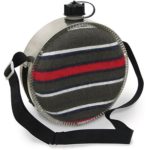
 This article starts off with the subject of water, one of the most important pieces of “equipment”, if not THE most important item to have, whether you’re day hiking or doing extended/overnight trips. That puts the canteen, the most popular hiking container for water, at the top of the equipment list. A canteen like the one shown comes in quart and half gallon sizes and costs under $20. I have tried gallon sized containers but at nearly 7 pounds per gallon, water is heavy.
On most hikes water is not perpetually at hand. Drinkable water even more scarce. Many times there is plenty water available, with none immediately drinkable. Making sure you have ample usable water is essential. In places like Canyonlands National Park, temperatures soar into the hundreds regularly in summer. Coupled with elevation changes encountered (making you need more water as well as energy), near zero humidity, and little to no availability, water must always be carried. This is the extreme but in many places, water is readily available at certain stops. For a real tale of no water, check out Dead Horse Point, Utah. Water is mentioned multiple times here due to its importance.
There are also water purification kits but I tend to take the easy way and go to the taps and springs that are clean. Boiling water also does the trick but you pay in energy used, i.e. fuel.
Beware of drinking from streams and other natural sources. Giardia is a very popular ailment to get from stream water. If you can’t get water you know is clean, there are filters. Also one of the best ways to purify water is to boil it, but know this consumes valuable fuel, even more fuel at higher elevations. (Water is one of the hardest substances to heat and cool known.) This is a call that is dependent on the hike itself. It’s better to have too much than too little. Never good to have none.
The canteen is not the only method of carrying water. There are bottles and other containers, even containers that allow you to drink from them while hiking. There are lots of methods and vessels for this. Type and capacity can be highly individualized.
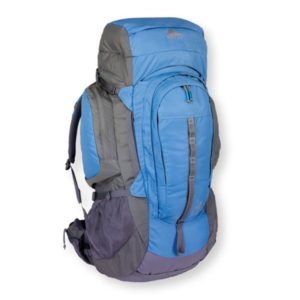
 If you’re going to do more than a day hike, you’ll need a good backpack for each person. There are lots of brands to choose from. —Click on the links for additional information— The good part is that there are lots of good prices to choose from also. For under a hundred dollars you can choose among many good brands. I like the $79 to $129 range. Here seems to be the most durability for the least money. I tried external frame packs first and they were acceptable until I tried one of the internal frame models. Now i really suggest the internal frames. The ones pictured are the Kelty Coyote and Gregory, two similar packs. The frames are highly adjustable and can be shaped to fit your back. (This is one of the reasons why a backpacking trip needs planning first.) Kelty is one of the big names in backpacking equipment and have a lot of lower priced but good gear. Of note is many packs come in men and women’s models, sleeping bags in left and right.
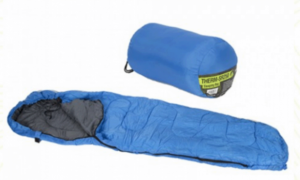
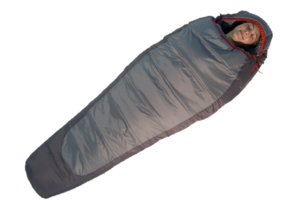 <-------- Lets take a look at sleeping bags. They can be found in many configurations. Notice the "ideal" situation shown here. How many of us are not back sleepers? This makes mummy bags hard to fit, especially the ones with the part that fits around the head. There is no side sleepers bag, plain and simple. I try to mitigate the issue by buying 90+ inch bags. The head cover then becomes more of a nuisance than a help. There's no real happy medium.
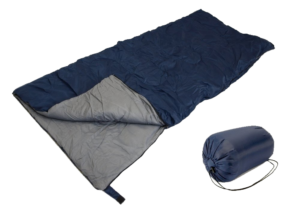 You will often have the choice of a square bag or a mummy. Square bags can be had for little or nothing. They are usually bulky and inefficient – Better for car camping, if that. Mummys come in all kinds of configurations today. The main items to consider are fit, and temperature rating. When I say fit, I mean if the bag fits you AND does it fit in your backpack. This is important. When you are looking for a bag to buy, you will immediately have trouble finding the rolled up, storage size. Making that mistake cost me a major hike – The bag I bought was a bulky, heavy, square bag, that would not fit into the pack at all, and could not be firmly attached to the backpack. In retrospect, I needed an extra long, mummy bag that could be compressed down to a cylinder of about 16 by 9 inches! That was found in a 40 degree, 90 inch, Alpine Design bag, that comes in left and right handed models. Cost $19.95 on clearance.
There’s always the question of what temperature rating to buy. Part of this issue is solved here by being a warm weather human. I’m just not going to be out there camping in cold conditions. So that makes me able to use sleeping bags with higher temperature ratings and lower prices. I try to stick with the smallest compressed size bag with the lowest temperature rating that is under $100. The need for a long bag sometimes increases the price. Due to there not being much published information on compressed bag sizes, I usually buy from stock on hand. Sometimes, if a bag is found on line or in a catalog, I check the return policy if I cant ascertain the packed down size readily, so if it’s too large rolled up it can be returned easily. Many companies are making longer bags now. Some come in left and right models. Of note is whether to use left or right handed sleeping bags in certain tents due to which direction the front door opens.
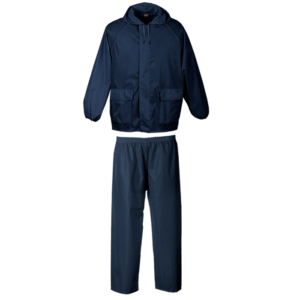 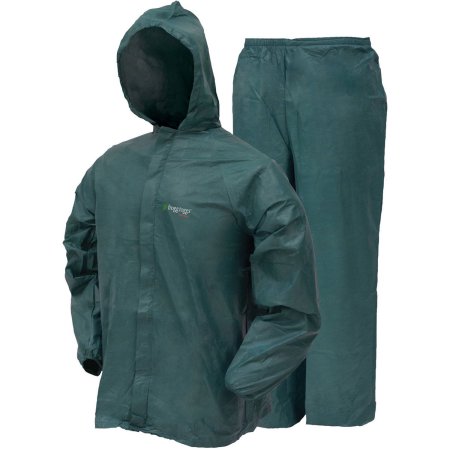 Nothing like being caught in the rain with no raincoat after the weather report said this was THE day. So much for that. OK maybe you won’t need a raincoat in the desert. Even there though, you can get rain. So a rainsuit is a good piece of insurance. As with any such piece, you want it to be small and light when rolled up. There are a few that don’t break the budget. Between $20 and $50 you can get a good set. The easiest found are the Coleman and Frogg Toggs suits, with the Toggs coming in at smallest and least expensive. They do have the disadvantage of being more fragile than the Coleman. You can get the Toggs for $29.95 and the Coleman for about$40. Check around. There are lots of other sets. Nothing like being caught in the rain with no raincoat after the weather report said this was THE day. So much for that. OK maybe you won’t need a raincoat in the desert. Even there though, you can get rain. So a rainsuit is a good piece of insurance. As with any such piece, you want it to be small and light when rolled up. There are a few that don’t break the budget. Between $20 and $50 you can get a good set. The easiest found are the Coleman and Frogg Toggs suits, with the Toggs coming in at smallest and least expensive. They do have the disadvantage of being more fragile than the Coleman. You can get the Toggs for $29.95 and the Coleman for about$40. Check around. There are lots of other sets.
|
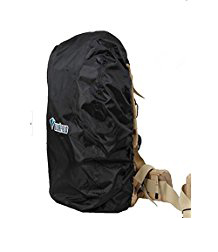 Along with keeping yourself dry, you want to keep your gear dry. Many companies make backpack rain flys. Look around. These range from about $10 to near the sky. Some manufacturers make them to fit certain packs. I use one that is made to fit and matches the color of my blue Kelty Coyote. Cost about $20.
 Your feet are carrying the whole vacation. Take care of them. Having a good hiking boot is essential. There are lots of options. I find Ozark Trails to have the best for the money. I have also used many a good walking work boot that has already been broken in and tested. Depending on where you plan to go and that particular terrain, you might even be able to get away with gym shoes.
The real key is socks. Again I found a cheap way to go on this. I use work socks. They are designed well and priced cheap. Can be purchased in 10 paks. Always carry several pair on any hike just to be sure, AND have an extra pair for that buddy that didn’t think so hard. A blister on the first day is uncivilized.
 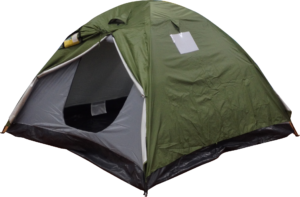 The first question about a tent is whether or not you want to carry one. Many folks don’t use them. I’m a tent person. The first question about a tent is whether or not you want to carry one. Many folks don’t use them. I’m a tent person.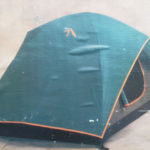 In my opinion the Coleman Peak I Aries tent was the best ever made for backpacking. It is similar to the Stansport tent shown right. These tents are easy to put up, durable, and pack down to a small package. The structure is supported on two poles with the rainfly attaching to the poles and not the tent, resulting in better rain protection. Sizes and packed sizes vary. In my opinion the Coleman Peak I Aries tent was the best ever made for backpacking. It is similar to the Stansport tent shown right. These tents are easy to put up, durable, and pack down to a small package. The structure is supported on two poles with the rainfly attaching to the poles and not the tent, resulting in better rain protection. Sizes and packed sizes vary.
Another issue is whether the tent will be truly waterproof. You don’t want a tent that leaks wherever the fly touches the tent. There are a lot of tents that will do this. That’s where doing the dry run will help. See Dry Run section on this. A major consideration has been whether or not the tent is truly a free standing dome tent. A lot(!) of tents are advertised as free standing dome tents but are in fact not, due to the need to stake down the vestibule. With tents similar to the Stansport and Peak I, the rainfly is attached to the base of the main poles, making it possible to pick up the tent with the rainfly attached. They can still be staked down but this is not necessary. In many places, especially in the Rocky Mountains and Yellowstone, you can’t use stakes everywhere. Why do you think they are called Rocky Mountains. Huh! Stakes don’t do much good in sand either. The types of terrain in places like Canyonlands National Recreation Area are just too soft for stakes to hold. Also notice the D-door. This might cause one to buy a left or right handed sleeping bag. I’ve always stayed under $100 for the tent, usually in the $70 range. This is the one item that has more of a range of styles and prices than any other piece of backpacking gear. Ease of setup and take down is the major consideration with any tent, no matter the price. My recommendations is keep it at the least cost for the quality wanted. |
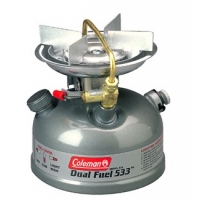
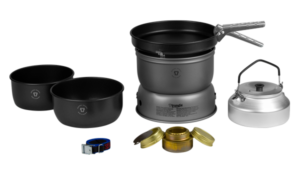
 Having a good cook set is important. Again, there are lots of sets but small, light, with the ability to pack down without wasting space is the ticket. Unfortunately many of the stoves are not cheap. One might be able to find one of the
Coleman stoves such as the older 533 pictured here in a surplus store. The few parts are replaceable and available. You can order one of these new from WalMart for about $67. I scrounged an aluminum 16oz bottle with screw cap for extra gas. The 533 uses Coleman fuel, which stays out of stock most places, as well as unleaded gas, which is the most economical and readily available bet. Burn time is about 2 hours. Rating 10,500 btu. The stove is about 8 inches in diameter and height. I have carried it both open inside the pack and inside a plastic can with no problems. Extra fuel packs anywhere. This particular stove is especially good in wind. Their design has a built in windshield. I think it’s the best for the price. You don’t have to be on the trail to use it either.
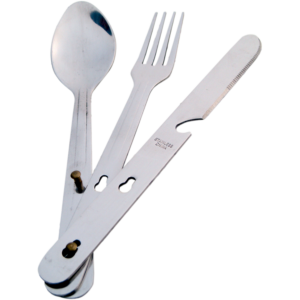
 Again I found Ozark Trails has some of the best cooking gear for the buck. The set you see here have to be ordered though. Takes a week. The type of set purchased should match the kind of cooking/eating to be done on the hike. I use a much smaller set than this. It’s back to the spreadsheet/plan. Some cooking sets also come with eating gear like plates, cups, and utensils. There are a lot of choices in the $20-$40 range. Anything more gets into overkill, and anything less isn’t worth taking a chance on. As always the important issue is packed size – Whichever outfit is chosen must fit inside the pack.
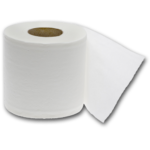 Along with having the right eats on the trail is having that all important piece of equipment – toilet paper. Y’gotta have it. It is not to be left in the woods, so carry a ziplock to hold the used product as well as other waste. It’s also a good idea to keep the toilet paper in a moisture resistant container of some sort, like a ziplock bag. Wet TP is no fun. It has been said that you should take only photos and leave only footprints when backpacking. (Actually there are a few places were you can’t leave footprints – Canyonlands is one of these places. It has cryptogamic soil, a highly fragile topsoil that takes years to replace once disturbed.) Toilet paper is your buddy.
And don’t overlook the ziplock bag. It is one of the more useful pieces of equipment. Take some extras with you.
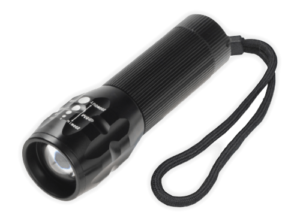 OK. So let there be light. LEDs rule! Plain and simple. The day of the Coleman Lantern are gone. The day of the big battery light is gone, too. Price of small flashlights: Can be free. There are a zillion kinds of these available. Take your choice. Keep them small and light. Don’t get too happy. Grab some extra batteries just in case. In addition to flashlights there are also LED lanterns, hanging lights, and more. OK. So let there be light. LEDs rule! Plain and simple. The day of the Coleman Lantern are gone. The day of the big battery light is gone, too. Price of small flashlights: Can be free. There are a zillion kinds of these available. Take your choice. Keep them small and light. Don’t get too happy. Grab some extra batteries just in case. In addition to flashlights there are also LED lanterns, hanging lights, and more. |
 Take a look at the drawing left. The idea is to keep bears as well as other animals out of your food and whatever else you might have. Contrary to some beliefs, bears DO climb trees. All that is needed is a string or small rope that is strong enough to hang a bag big enough to hold whatever you need protecting. You can use your sleeping bag stuff sack for this or carry an extra lightweight bag to fill the bill. In places like Glacier and Yellowstone bears are big(!) and have a long reach, so be sure to put the bag well out of reach. Use a basketball goal height (10 feet) as a minimum height for your goods bag, because some bears CAN reach that far. Racoons are also a consideration because they will carry off things they can’t eat.
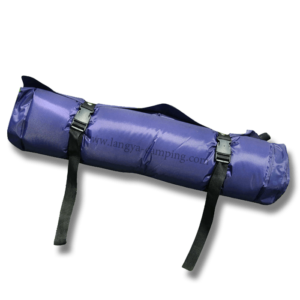 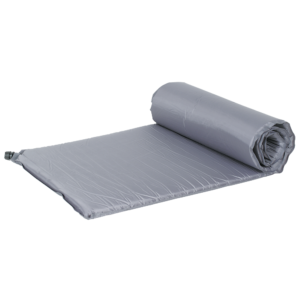 The self inflating air mattress is a great invention. The most economical issue is the 2 inch model. Any more is too expensive and any less gives little to no cushion. All you have to do is open the valve and roll it out. It takes a few minutes to inflate, then the valve is closed. To pack it up, just open the valve and roll it up. Thinner yet are sleeping pads. These range from egg crate bulky “foam rubber” to thin water proof foam plastic which can be quite inexpensive. For about $10 you can get a piece of memory foam and cut it to size. The mattress I use is Alpine Design that cost $19.95. The self inflating air mattress is a great invention. The most economical issue is the 2 inch model. Any more is too expensive and any less gives little to no cushion. All you have to do is open the valve and roll it out. It takes a few minutes to inflate, then the valve is closed. To pack it up, just open the valve and roll it up. Thinner yet are sleeping pads. These range from egg crate bulky “foam rubber” to thin water proof foam plastic which can be quite inexpensive. For about $10 you can get a piece of memory foam and cut it to size. The mattress I use is Alpine Design that cost $19.95. |
 This is a handy item if you are setting up “base camp” and doing day, or short, hikes from there. Many of these can be rolled up or otherwise packed inside a larger backpack. I once had a backpack that had an additional, removable, daypack, that could be used as part of the pack. This is an excellent idea but can be bulky. The most popular use of these packs is for school. They come in a near endless variety and price. Some feature bladder space so you can carry liquid and drink without stopping.
 The compression bag is an idea that allows you to further compress your sleeping bag after stuffing. The allowable size of the compression bag is determined by the inside dimensions of my back pack, i.e. about 16 inches by about 9 inches in diameter. The bag has to be able to compress its contents down to that size. The compression bag is an idea that allows you to further compress your sleeping bag after stuffing. The allowable size of the compression bag is determined by the inside dimensions of my back pack, i.e. about 16 inches by about 9 inches in diameter. The bag has to be able to compress its contents down to that size. |
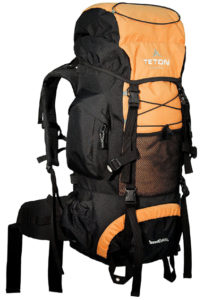
 Occasionally you will see outfits like the one to the left. Cost of this set is about $160. Careful. You do get what you pay for. Take the tent in this set. It’s small and is not very water resistant. The pack is minimal but not bad. Of issue is if the sleeping bag AND tent can fit inside the backpack and leave room for anything else needed? There is no rain or cooking gear. This will have to be added. So it’s best to look around. An outfit like the one pictured here might be a good starter, and will allow you to see how you will like the sport, without spending a mint.
IMPORTANT: There are certain items that EACH person must have – backpack, raingear, socks, hiking boots. While not on the Must Have list, insect repellent is also a handy item. I like to have my own!
I’m trying to give a range of equipment ideas in a lower echelon of prices. The aforementioned equipment is what can be considered a basic set. You can substitute or delete whatever you want. And there’s plenty of items that can be added. This will get you started.
Sources for each piece vary but a rule of thumb can be to look for clearance, reduced prices, close outs. Near the top of the shopping list, partly due to the fact that they are everywhere, is Wal-Mart. What you don’t see on the shelves can be ordered. Best to look at their offerings online because most of their more desirable backpacking gear is sold there instead of in any of the stores, and can be shipped to stores or directly to you in short order. Academy Sports, Dicks Sporting Goods(Oshmans), Bass Pro Shops, and Cabelas, are other major suppliers. Some folks swear by REI – They are just plain too expensive! I’m not even going to link to them. Depending on where you live you might have local or regional backpacking stores also such as Recreation Outlet in Salt Lake City. I have shopped with both online and in store and they have quite a selection. I don’t use army surplus stores much. The equipment tends to be older and heavier in weight. Same with thrift stores.
This covers a lot of basic necessities and is a one time buy unless you decide to upgrade or change out some equipment. The options for customization are nearly endless.
If you want to find out more, here are some manufacturers:
North Face
Eureka
Stansport
Kelty
Coleman
And, of course you can get your Ozark Trails gear through these suppliers:
Ozark Trail Tents
Ozark Trails at Amazon
Ozark Trails at Wal-Mart